
Impact provides some basic game collision detection and response for entities. This is often sufficient for Jump'n'Run or RPG games, but sometimes you need some more accurate and realistic physics. This is where Box2D comes in. Box2D is a physics engine, originally written in C++, ported to ActionScript and used in hundreds of games, including the incredibly popular Angry Birds.
Recently, the ActionScript version of Box2D has been ported to JavaScript. So let's use that in Impact!
The JavaScript version of Box2D lives in its own namespace. All Box2D Classes are now members of the Box2D. object. So for instance to refer to the b2BodyDef class you can use Box2D.Dynamics.b2BodyDef. I also wrapped the source into a module, to be easily loadable by Impact.
Please refer to the Box2D 2.1a Manual.
The source code for this demo with the Box2D Plugin can be found on your download page.
The first thing we need to do is setting up the Box2D World. For this, we just need to define a gravity vector and create an instance of b2World:
var gravity = new Box2D.Common.Math.b2Vec2( 0, 30 );

// Create the world and make it globally available as part of ig.
ig.world = new Box2D.Dynamics.b2World( gravity, true );
With the world ready, we can now add some objects to it.
var bodyDef = new Box2D.Dynamics.b2BodyDef();
bodyDef.position.Set( 100, 100 );

bodyDef.type = Box2D.Dynamics.b2Body.b2_dynamicBody;
var body = ig.world.CreateBody(bodyDef);

var fixture = new Box2D.Dynamics.b2FixtureDef;
fixture.shape = new Box2D.Collision.Shapes.b2PolygonShape();
fixture.shape.SetAsBox(5,5);

fixture.density = 1.0;
fixture.friction = 0.5;
fixture.restitution = 0.3;

body.CreateFixture(fixture);
Please note that the position we set (100, 100) specifies the origin of the object - its center point. This is different from Impact, where the position of an entity is set for the upper left corner of the entity. Also, the SetAsBox method takes half-width and half-height parameters. Thus box we created is 10 by 10 units in size and because its center is at (100,100), it will stretch out from (95,95) to (105,105).
After everything is set up, we can advance the physics simulation in our game's update method. The b2.World.Step() method takes three parameters: the timestep in seconds and the number of internal iterations for the velocity and positions computations. ig.system.tick provides the time that has passed since the last frame - which is exactly the amount of time our physics simulation should advance:
update: function() {
	ig.world.Step( ig.system.tick, 6, 6 );
	this.parent();
},
The units in Box2D are tuned to work well as meters. Your objects should be roughly between 0.1 and 10 meters in size - for most games this means that simply taking the pixel sizes as foundation for the physics could introduce some artifacts. Therefore, we use a global scaling factor to convert from our pixels to meters: Box2D.SCALE. By default it is set to 0.1 - that means that 1 pixel equals 0.1 meters.
Now, to integrate Box2D with Impact, it would be nice to have a base entity class that uses Box2D and a base Game class that creates the physics world. For this, I wrote the ig.Box2DGame and ig.Box2DEntity classes, that do all the dirty work for you. See the source code of the physics example game.
The .loadLevel() method of the ig.Box2DGame creates the physics world from a collision map. However, instead of just creating one physics object for each tile, it tries to find larger rectangle regions of tiles to combine into one object. In my tests, this worked quite nice even for larger game worlds. The performance of Box2D seems to be mostly bound by the number of collisions and not the number of objects in th world.
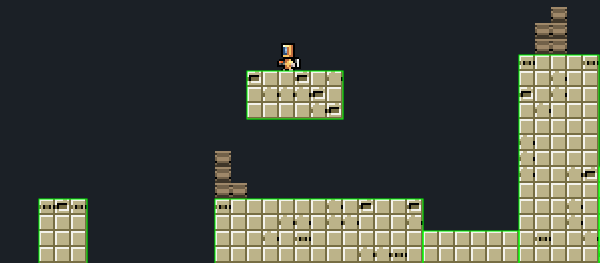
ig.Box2DGame has a special property debugCollisionRects, that when set to true will draw all the collision boxes as green outlines.
The ig.Box2DEntity automatically creates a physics body with the size of the entity. Its update() method takes the position of the body from the physics simulation and converts it back to Impact's unit system. This update method completely bypasses the one the base ig.Entity that normally moves the entity.
So, to define a simple physics enabled crate entity, all you have to do is to subclass ig.Box2DEntity:
// Subclassing ig.Box2DEntity instead of ig.Entity inherits
// everything needed for the physics simulation
EntityCrate = ig.Box2DEntity.extend({
	size: {x: 8, y: 8},

	// Collision is already handled by Box2D!
	collides: ig.Entity.COLLIDES.NEVER,

	animSheet: new ig.AnimationSheet( 'media/crate.png', 8, 8 ),

	init: function( x, y, settings ) {
		this.addAnim( 'idle', 1, [0] );
		this.parent( x, y, settings );
	}
});
To move your entities around, use Box2D's ApplyForce and ApplyImpulse functions. E.g. for our player entity:
update: function() {
	…

	// jetpack
	if( ig.input.state('jump') ) {
		var force = new Box2D.Common.Math.b2Vec2(0,-30);
		this.body.ApplyForce(force , this.body.GetPosition());
	}

	…

	this.parent();
}